
NoBo Murphy Bed Modification
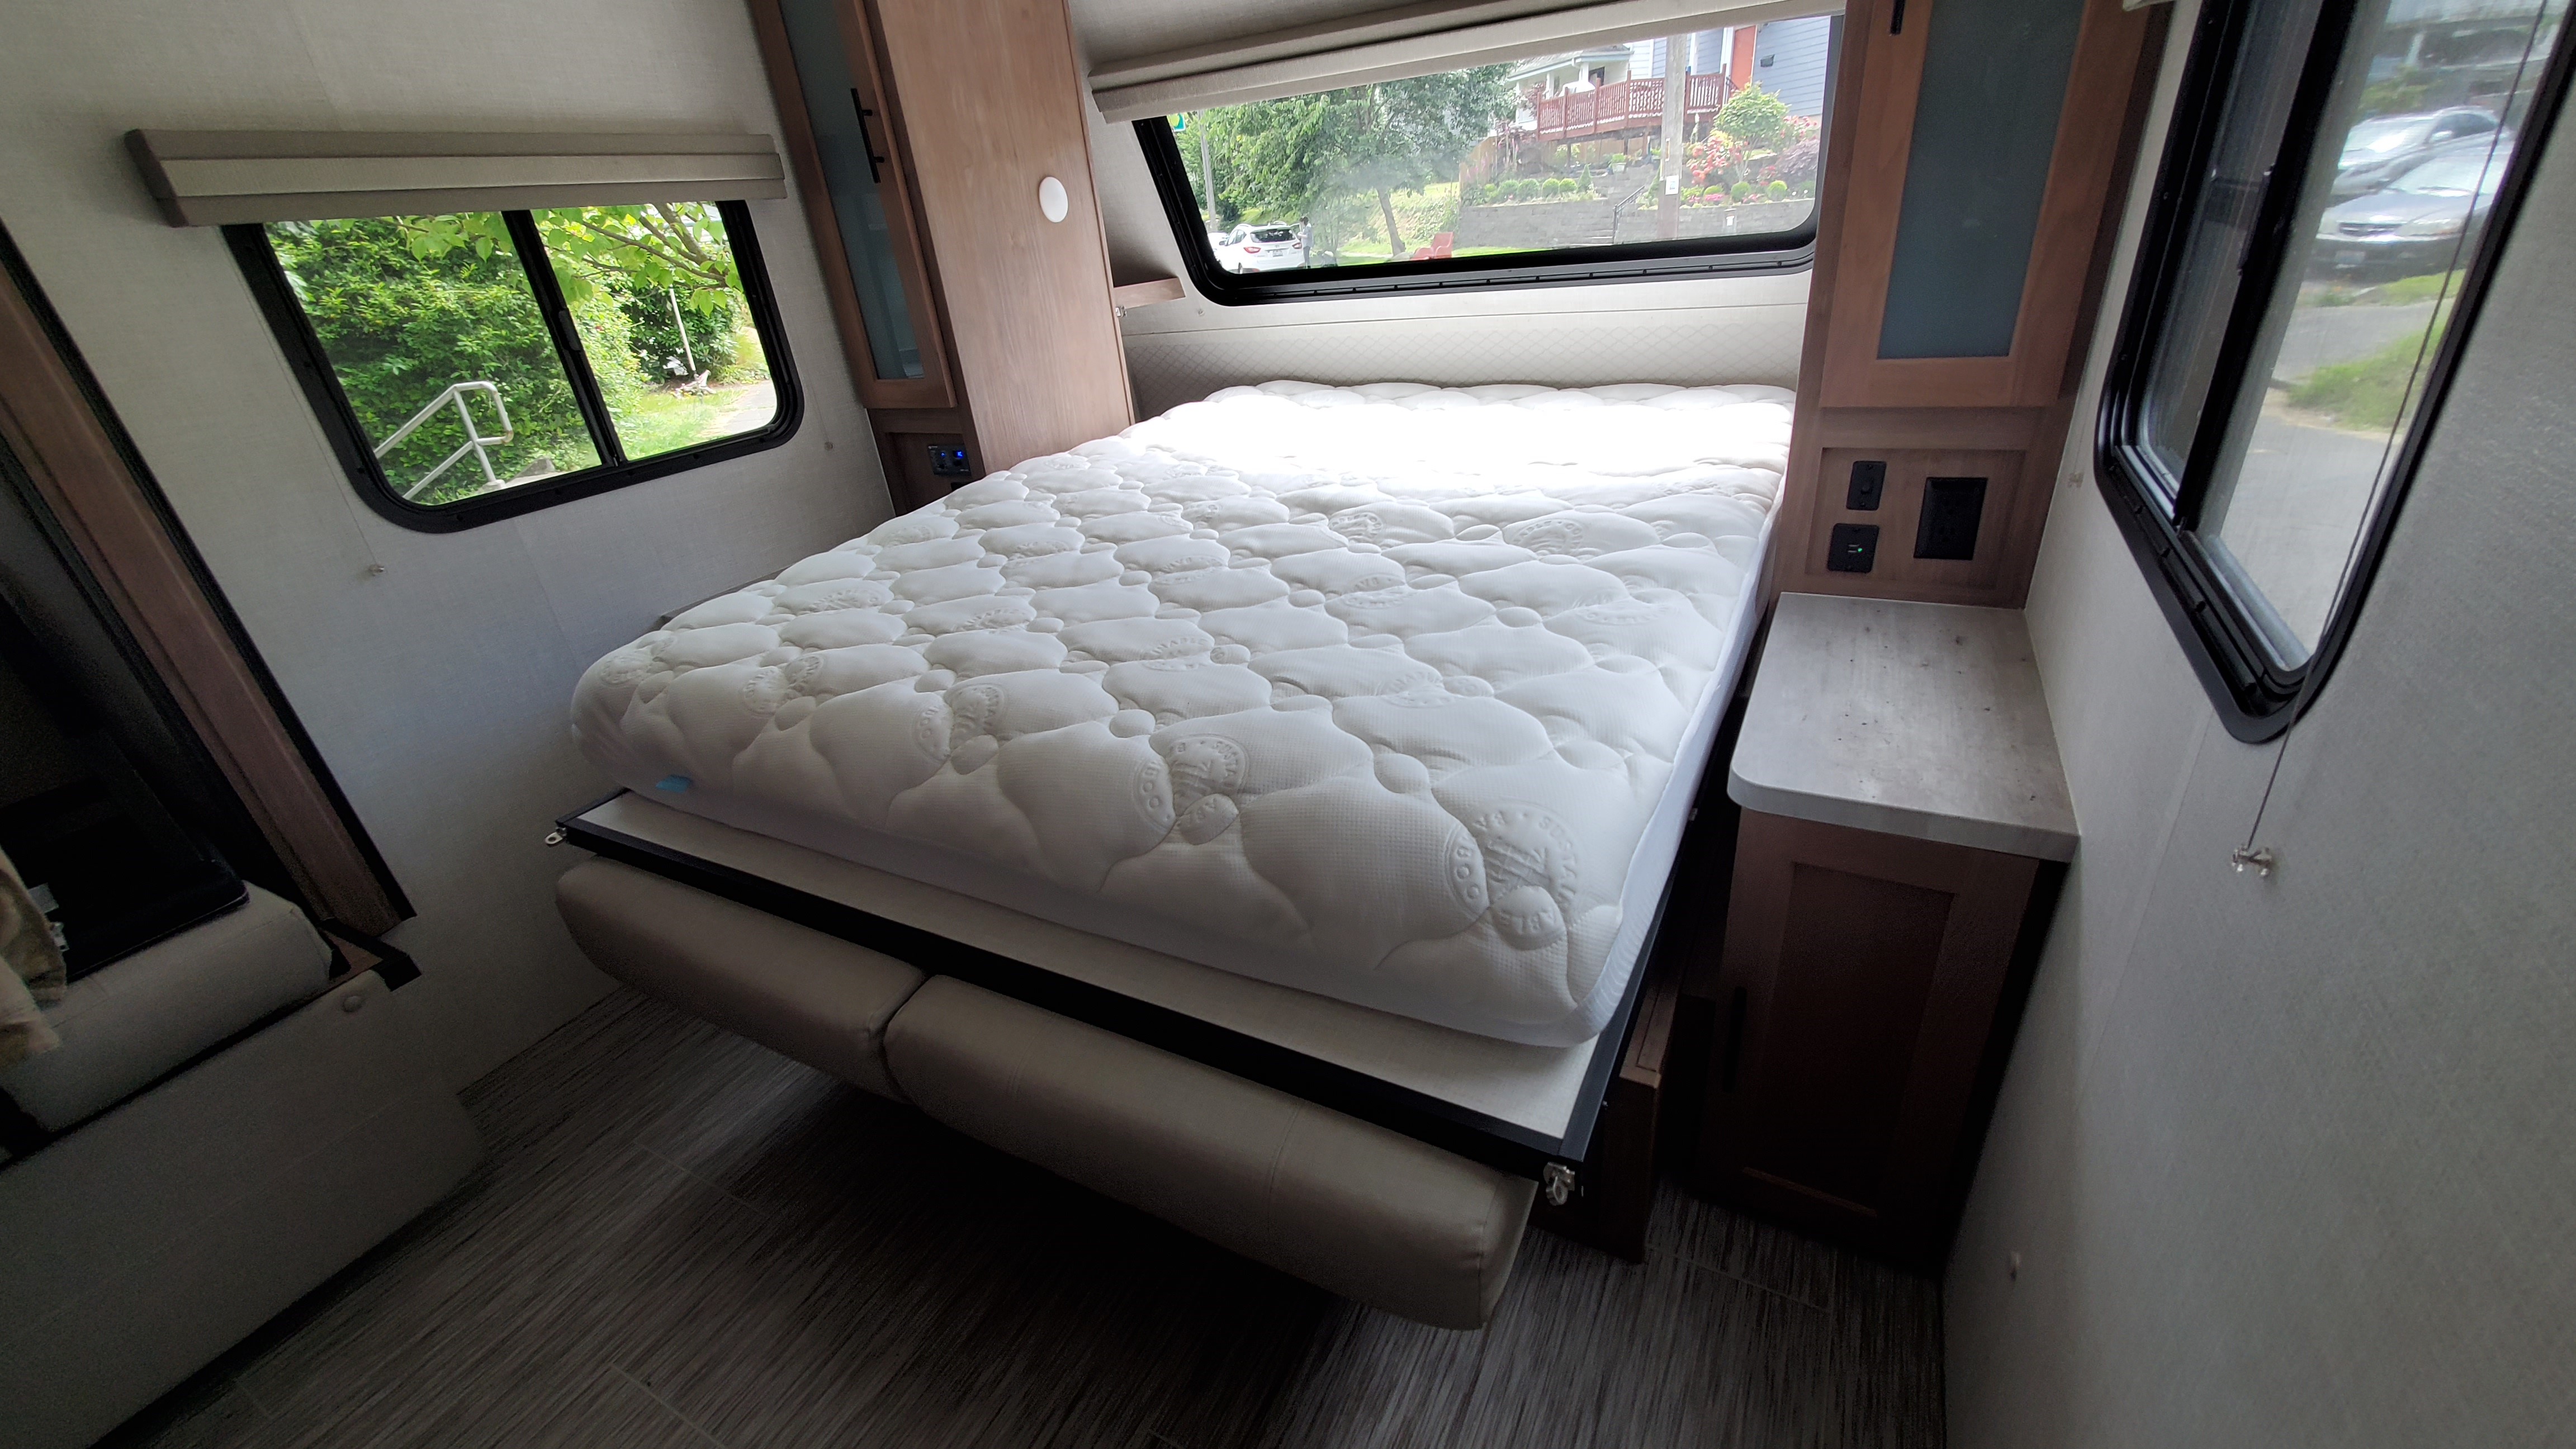
In the 2020 No boundaries 19.6 model (and in other models), NoBo does a vertical murphy bed at the end of the trailer. This has the very unfortunate downside that while the bed is put away, it completely blocks the window.
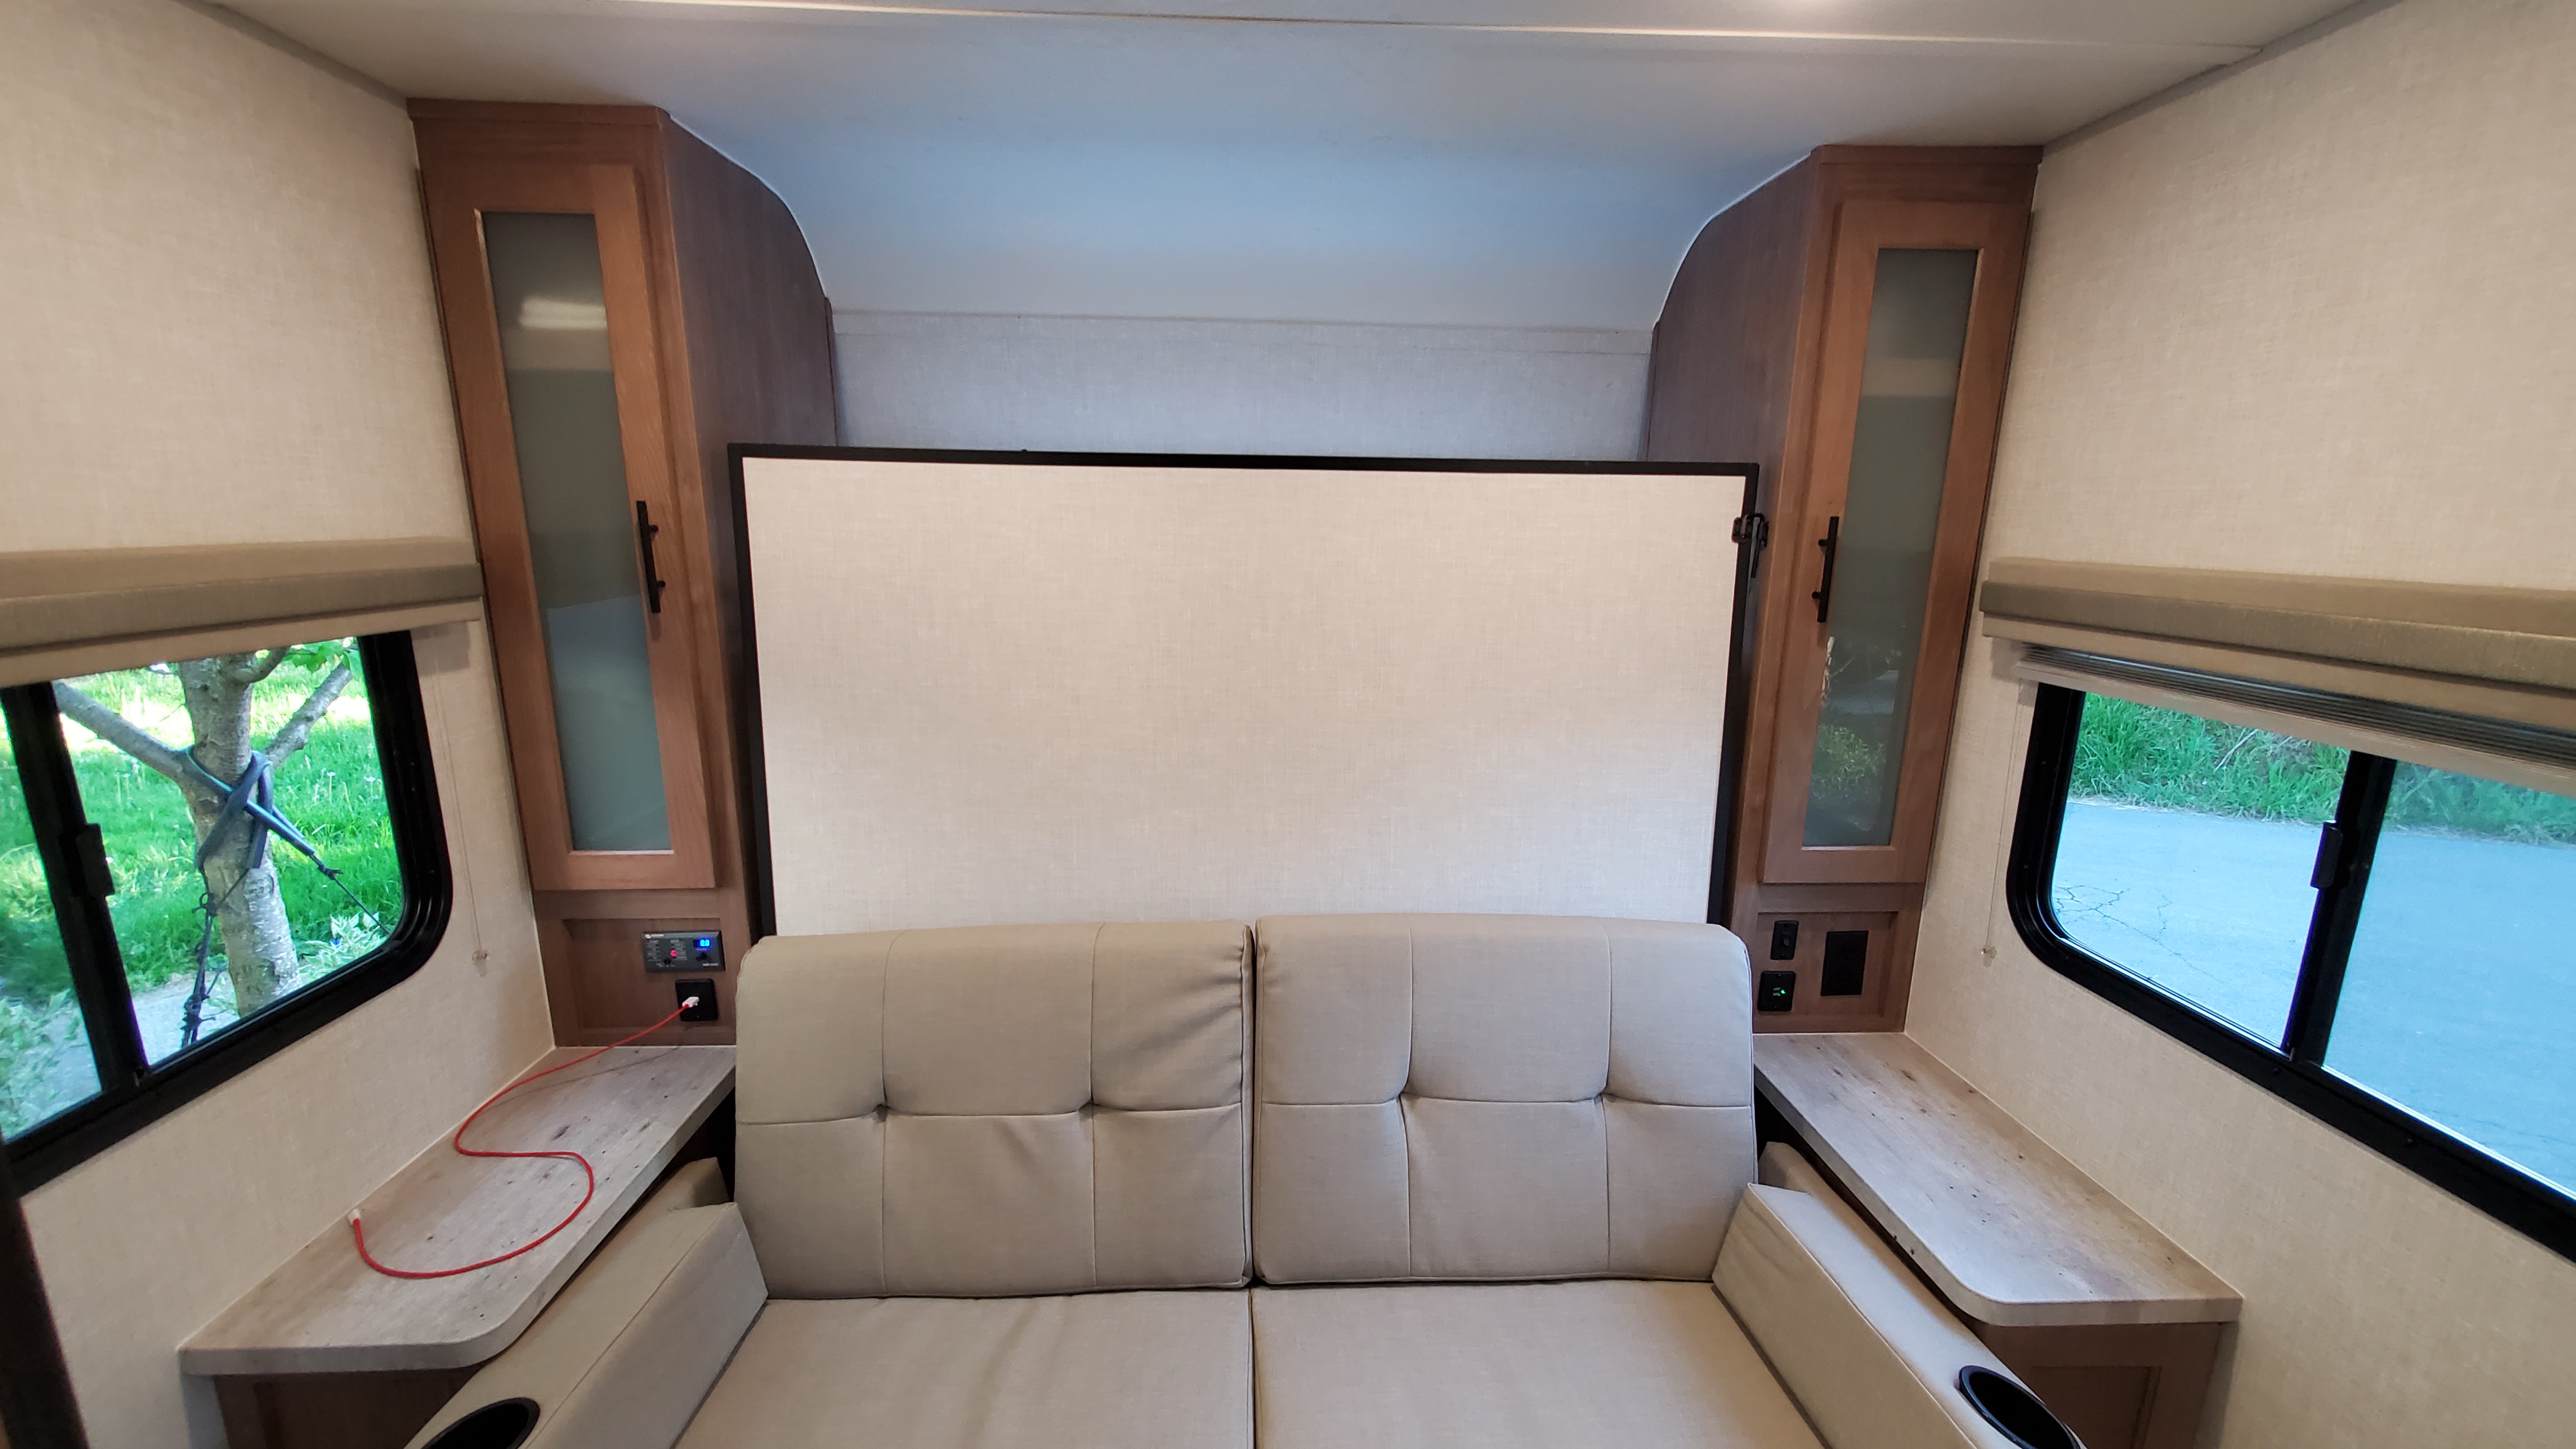
I wanted to see if there was a way to reclaim this by having the bed fold fully flat. In short: it’s possible, but it’s a game of inches and you have to be very careful with your cutting. I would strongly suggest measuring your own trailer setup as you follow along, to make sure the math works out for you too.
We’ll do this in three parts: the mattress, the bed board, and the locks.
THE MATTRESS
Our goal with the mattress is to get something that can fold completely flat back on top of itself. The bed is a queen, which should mean 60” wide and 80” long. The actual original mattress is only 78” long, and your replacement will have to be the same (or in fact smaller) or it’s unlikely to all fit. The replacement mattress obviously must be a solid foam mattress. Don’t go too tall with it or it won’t all fit. I ended up buying this mattress:
https://www.amazon.com/gp/product/B01N0VNL1N/ref=ppx_yo_dt_b_search_asin_title?ie=UTF8&psc=1
It has a few advantages: it’s only 6” thick (don’t worry, we’re adding toppers later), and its inner core is solid (some of them include that egg carton foam for airflow but I was worried how that would work when cut.) This mattress was 82” long. I had no choice but to cut it back, before cutting it in half.
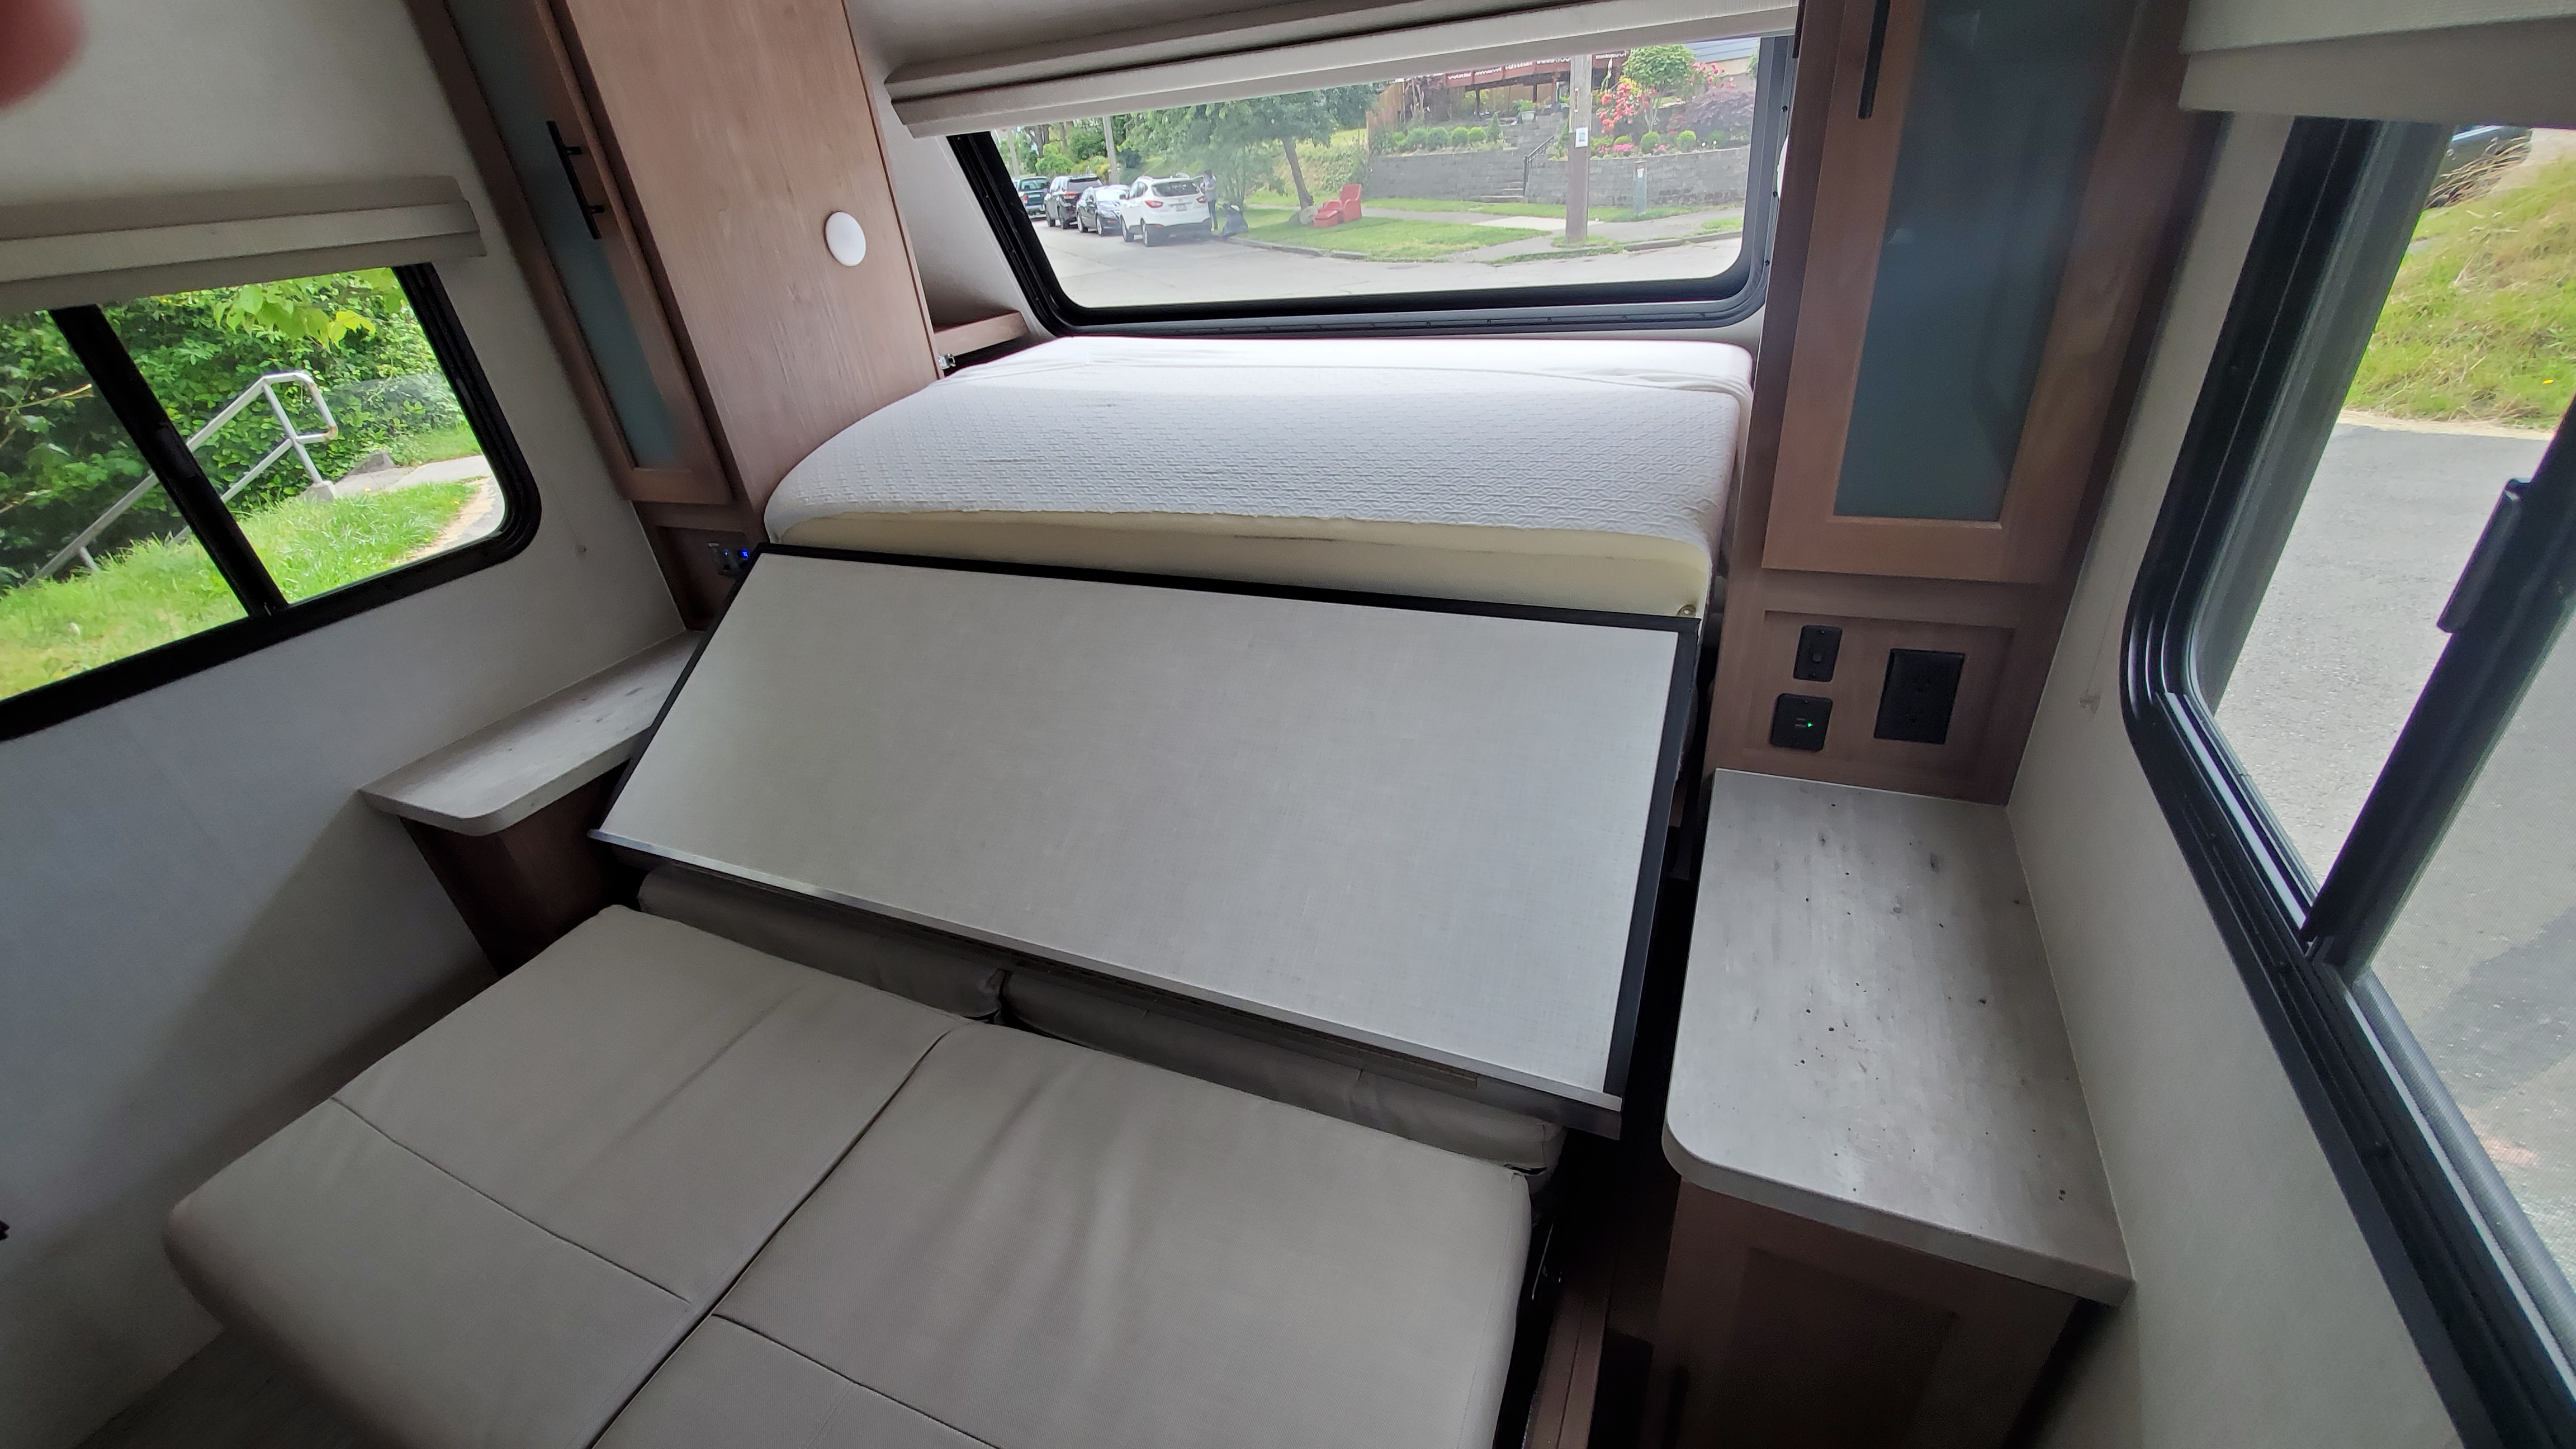
Your cut point is entirely driven by the hinge point of the board (which CANNOT be moved; if you move it forward even an inch or two, you won’t be able to fold the sofa back up. Maybe the sofa can be moved too, I didn’t try). Double-check on your trailer, but for ours the hinge is exactly 38” from the back wall. This is the worst part, because 38x2 = 76”, which is 2” shorter than the original mattress and 4” shorter than a queen is supposed to be. In the end I cut our mattress back to 76”, then cut it into two halves at 38” each. (Actually looking at it, the top half looks even shorter than this and shorter than the bottom half, but this is what I remember doing.) It cuts pretty well with a decent butcher knife.
As we go along, you need to do everything you can to keep the mattress halves as a unit. If you’re willing to sew a proper sleeve like the original, go nuts. What I did was to remove the mattress from the zippered sleeve, cut it, put it back in the sleeve upside down (so the zipper is on top, the side where it’ll hinge) and then cut all sides of the sleeve except the top. Didn’t have to cut through the zipper, and the more rigid top (formerly bottom) of the sleeve helps keep things behaving. The topper will help, too.
Because the mattress was so thin, I also bought a 2” memory foam topper to add which I did NOT cut in half. I got this one (have to shorten the topper, too):
https://www.amazon.com/gp/product/B07WHDVY6B/ref=ppx_yo_dt_b_search_asin_title?ie=UTF8&psc=1
You do NOT have to cut the topper in half. It will fold just fine. At this point you might be thinking, “Well I’ll just get a thicker 8” mattress and just not cut it all the way through!” Yeah, tried that. When you fold the mattress, it will finish tearing itself in half whether you like it or not. The topper has to be separate.
The last piece of the puzzle, to hold the whole thing together, is another mattress topper that wraps around the mattress with elastic. Perhaps this isn’t needed and the fitted sheet will hold it all together, but this is what works for me. You also may be forced to ditch this if things aren’t quite fitting for you. I used this wrapping topper:
https://www.amazon.com/gp/product/B008URGSWO/ref=ppx_yo_dt_b_search_asin_title?ie=UTF8&psc=1
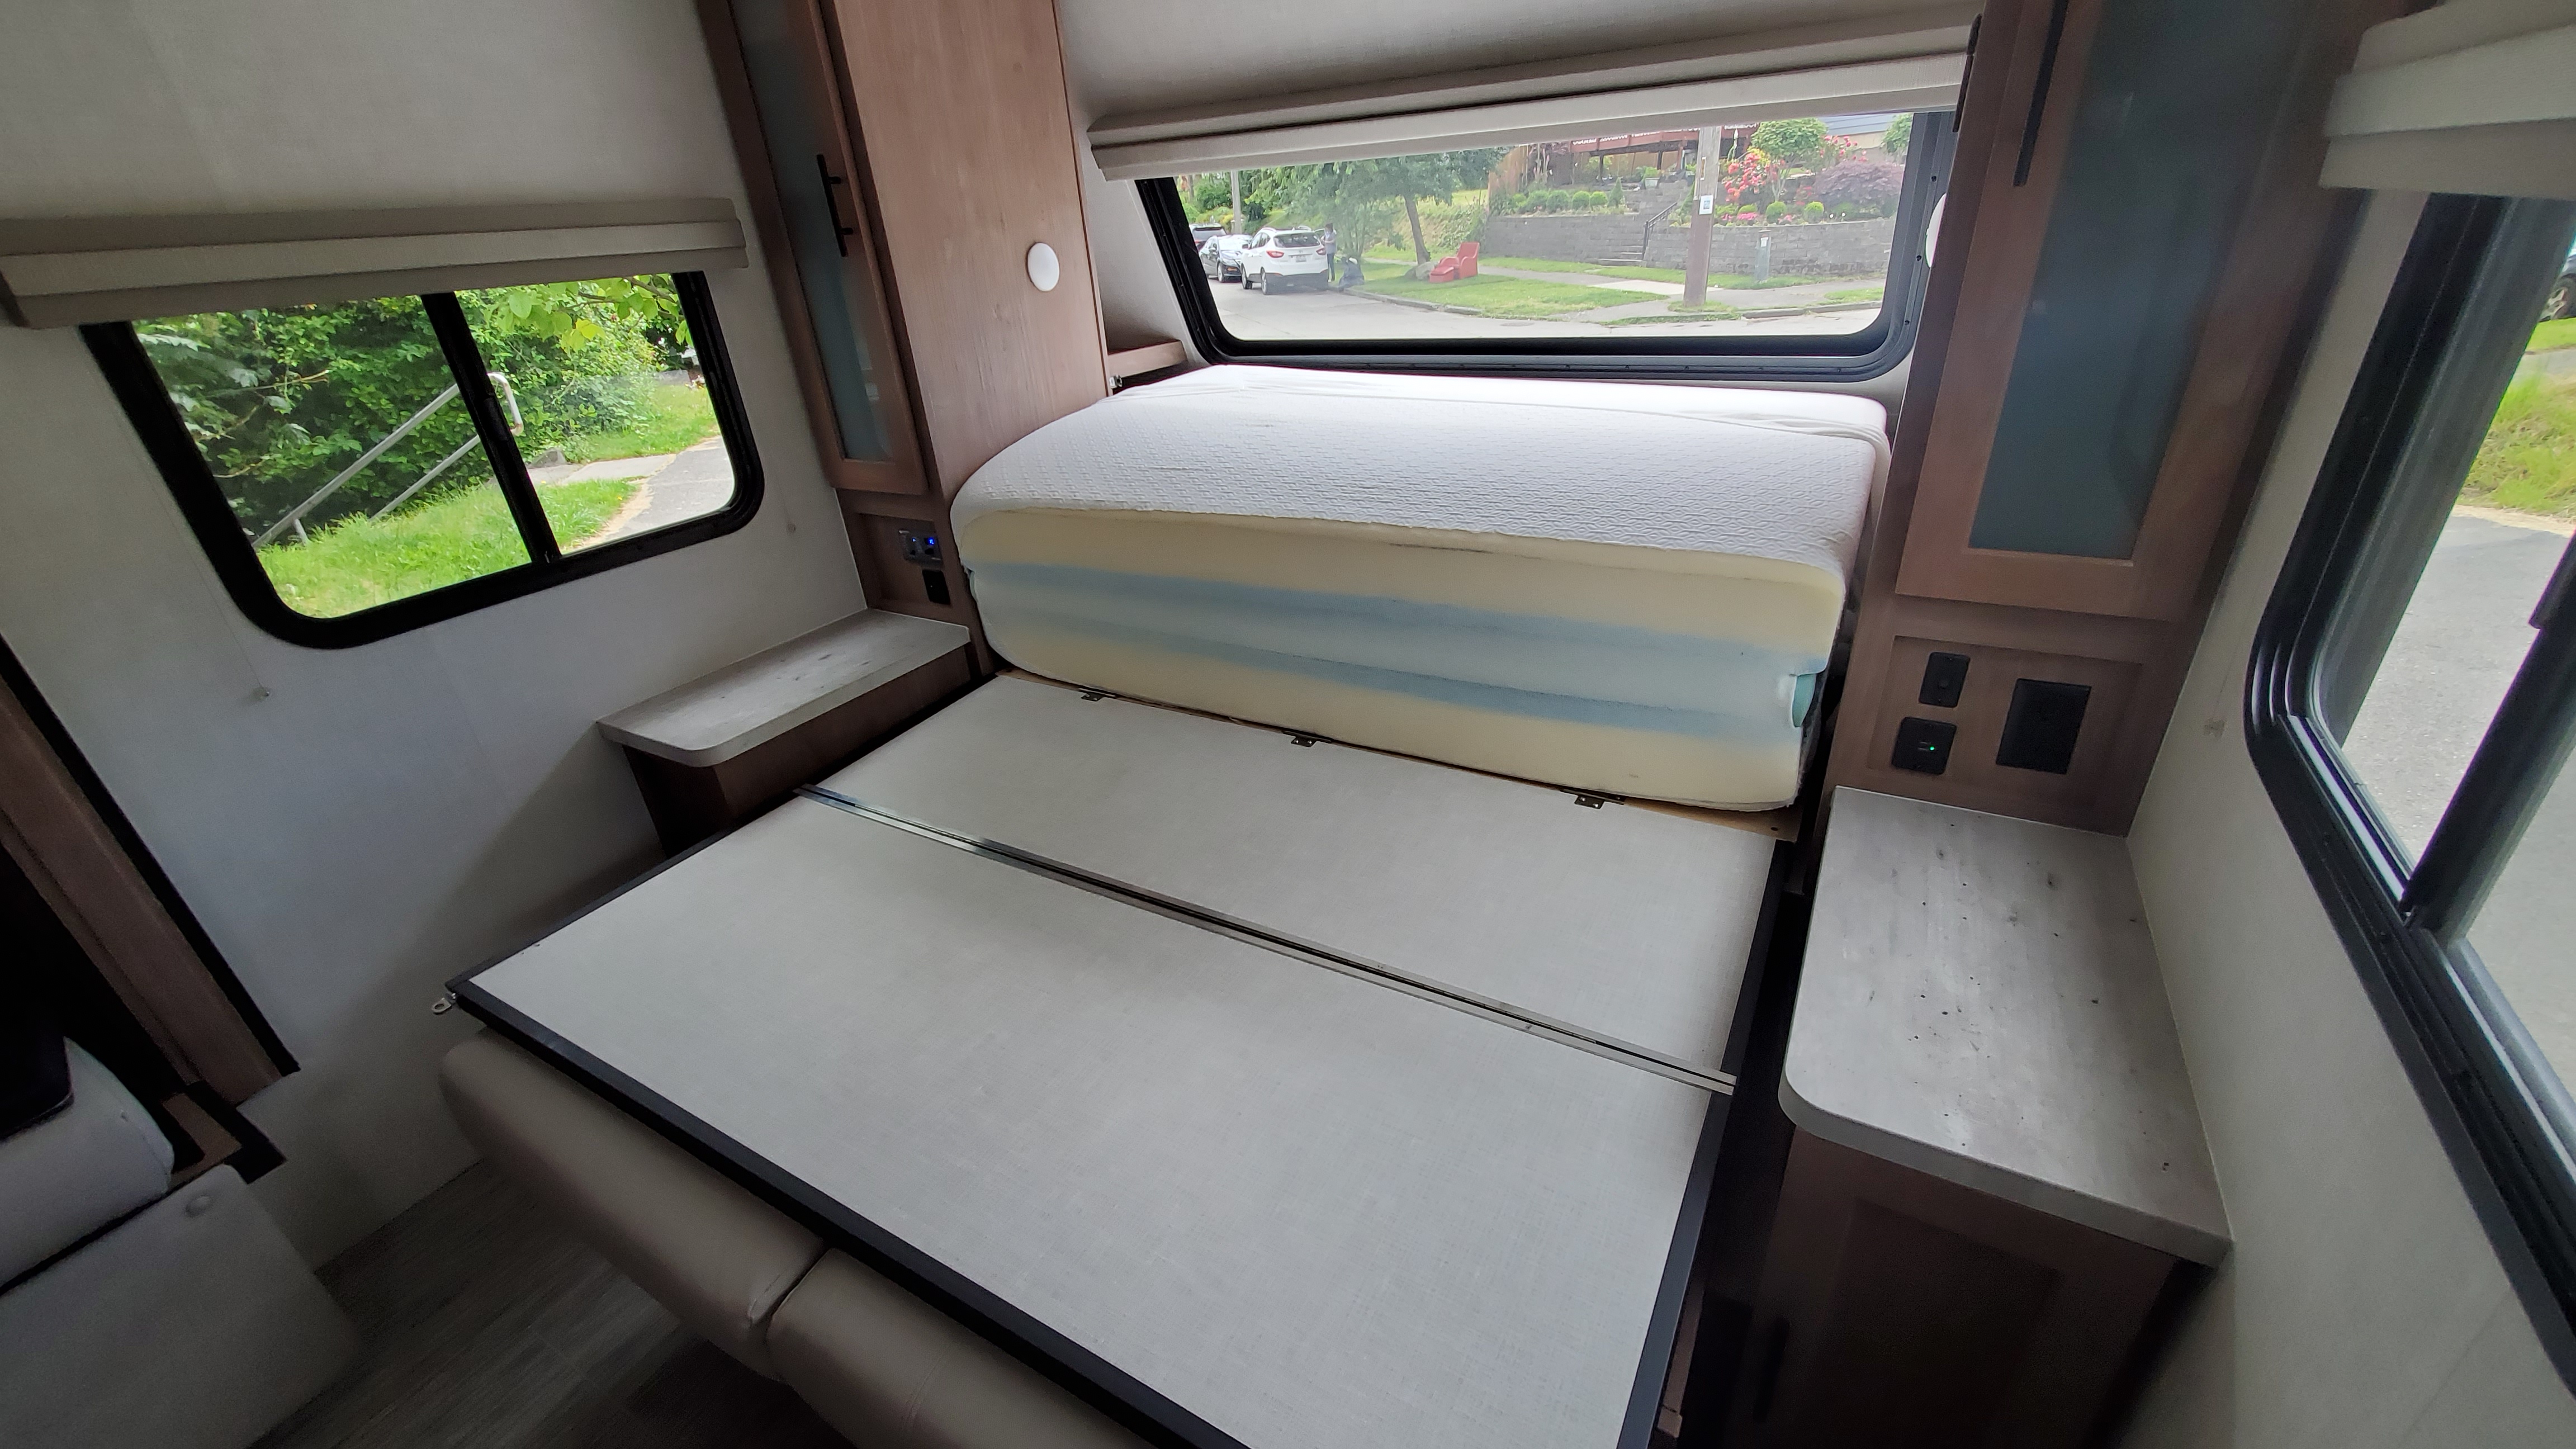
So all together, you have the shortened 6” foam mattress cut in half, the shortened 2” thick topper NOT cut in half, and the stretchy topper holding the whole thing together. Flop it over and back a few times, see how well it all goes for you. You cannot have pillows or a comforter on it; those get shoved into the cubby on either side. Try lifting the board to vertical a few times, how close to vertical can you get? Note the board was never vertical, not truly. I wasn’t able to get any better than they did, in that regard.
THE BOARD
So now it’s time to cut the board itself. Continuing this game of inches, you have to balance several things at once: the cut needs to be high enough that it’s above the thickness of your folded mattress. And for us, we cut it so that when folded forward on top of the mattress, the end of the board aligns with the back side of the closets on either side of the bed. This is where we installed the latches to hold the whole thing in place (last step, later).
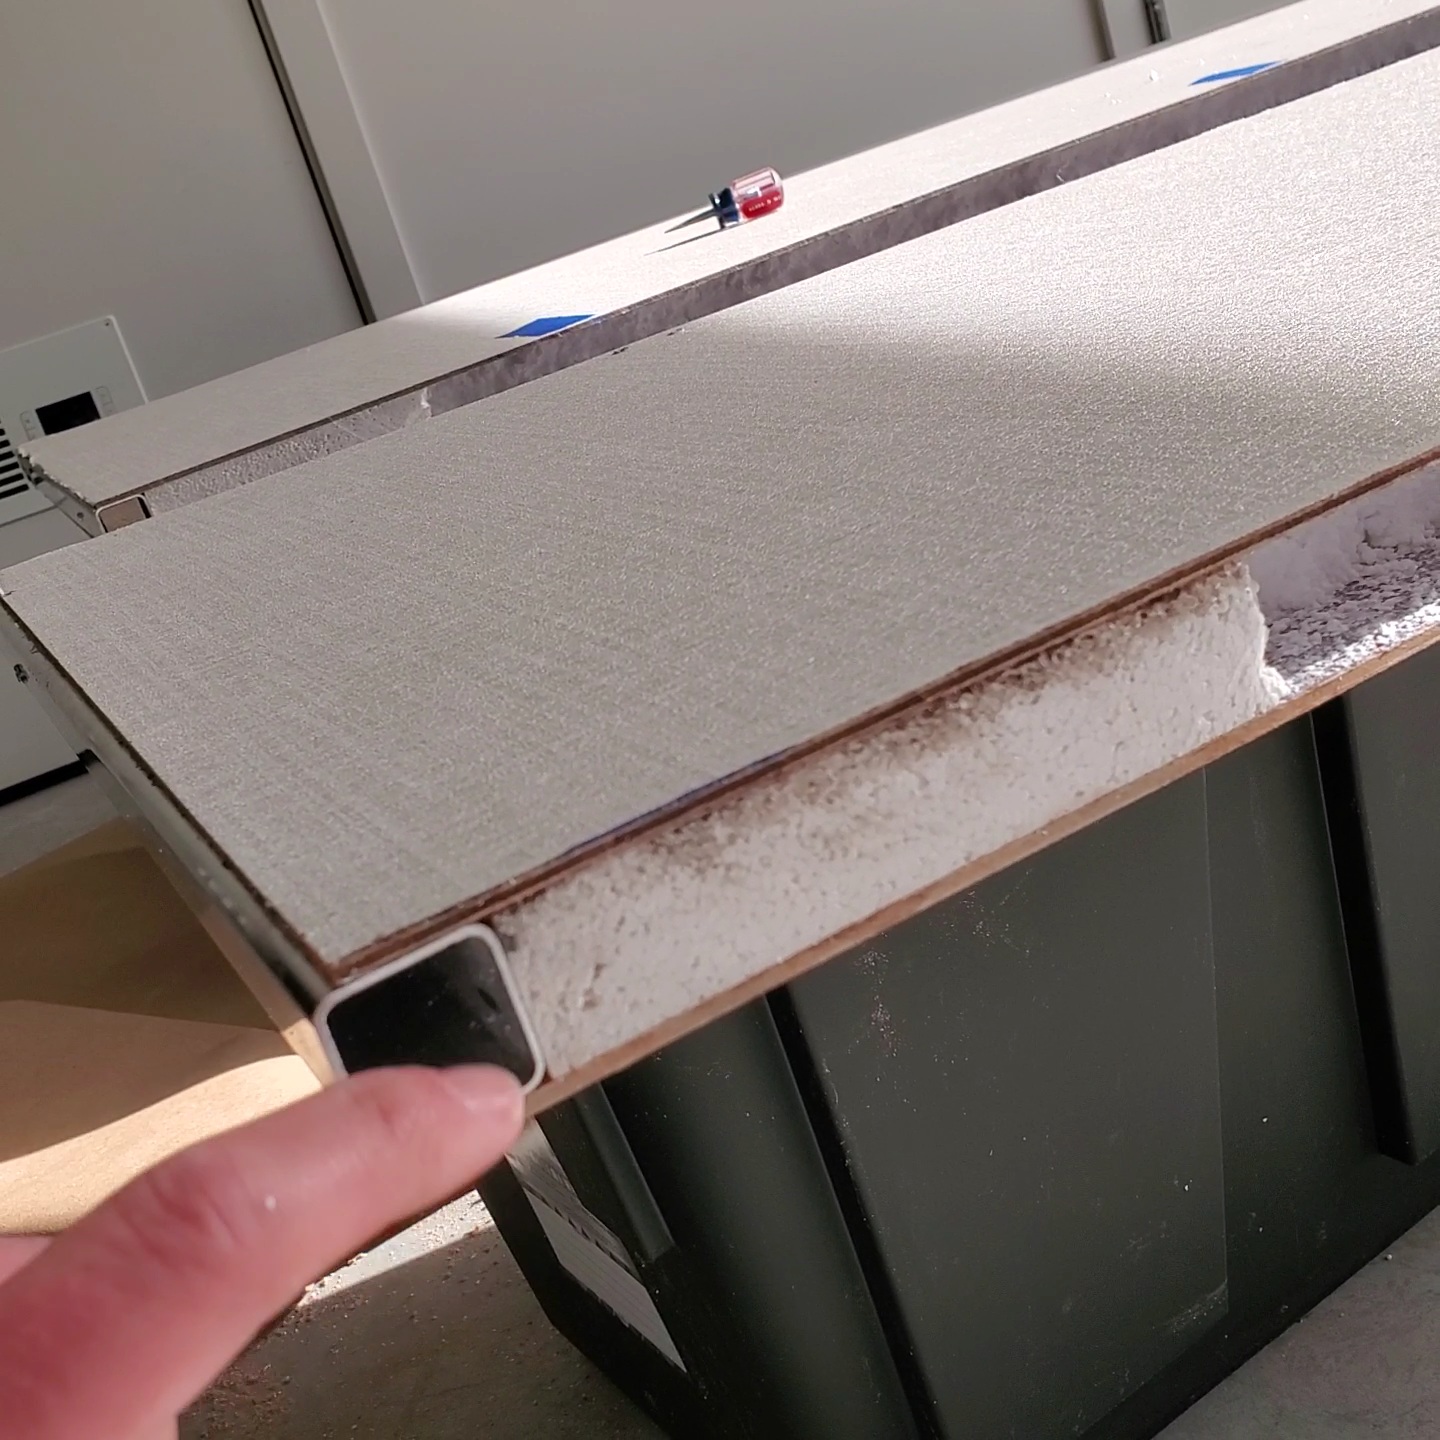
The board is aluminum frame, with the decorative backer board. It is full of styrofoam. Here’s a photo of what it looks inside when cut:
For my measurements, I made the cut precisely 20” up from the hinge edge of the board. Again do your own math; the board will go straight up (or as close to straight up as you’re able to get it with the mattress in the way) and then fold forward. Find the point where folding forward brings an end to the board where it aligns with the back side of those hanging clothes cabinets.
To cut the board I used a circular saw with a clamped guide to keep be straight. Tape on some paper to protect the finish. Once it’s cut you’ll have to hollow out the styrofoam with a flat-bladed screwdriver, because you’re going to want to slip a 3/4” thick board (I think) into the gap to strengthen it. I glued the board in place as well as screwing in from the ends.
Now you probably want to deal with decorative edging. You can put the black plastic edging back on (have to cut that in half too, of course), I ended up getting some aluminum edge pieces from Grainger because I couldn’t find more of the plastic. I’d suggest calling Forest River though, good chance they’ll sell you some.
With the board cut and edged, last thing is installing a hinge. I used a piano hinge for strength and because they’re easier to align in these situations than a series of individual hinges. 4’ piano hinge from Lowe’s. The screws it came with seemed worryingly small so I got one size bigger to make sure it has strength. Remember, when you sit on the edge of the bed you’ll be pulling against this hinge!
THE HASPS
Finally the hasps. I went with two marine hasps:
https://www.amazon.com/gp/product/B000HA9JZU/ref=ppx_yo_dt_b_asin_title_o08_s01?ie=UTF8&psc=1
Hasps are mounted to the back side of the cabinets, with the rotating hasp part (it’s important to get those that rotate so they’re self-locking) on the “top” of the bed backer board. I set them at a height so the board would be level when latched, which means it isn’t actually resting on top of the mattress. But the hasps are strong, there’s been no sign at all of weakness! We travel with it up and latched.

ALL DONE
So this is what you have now:
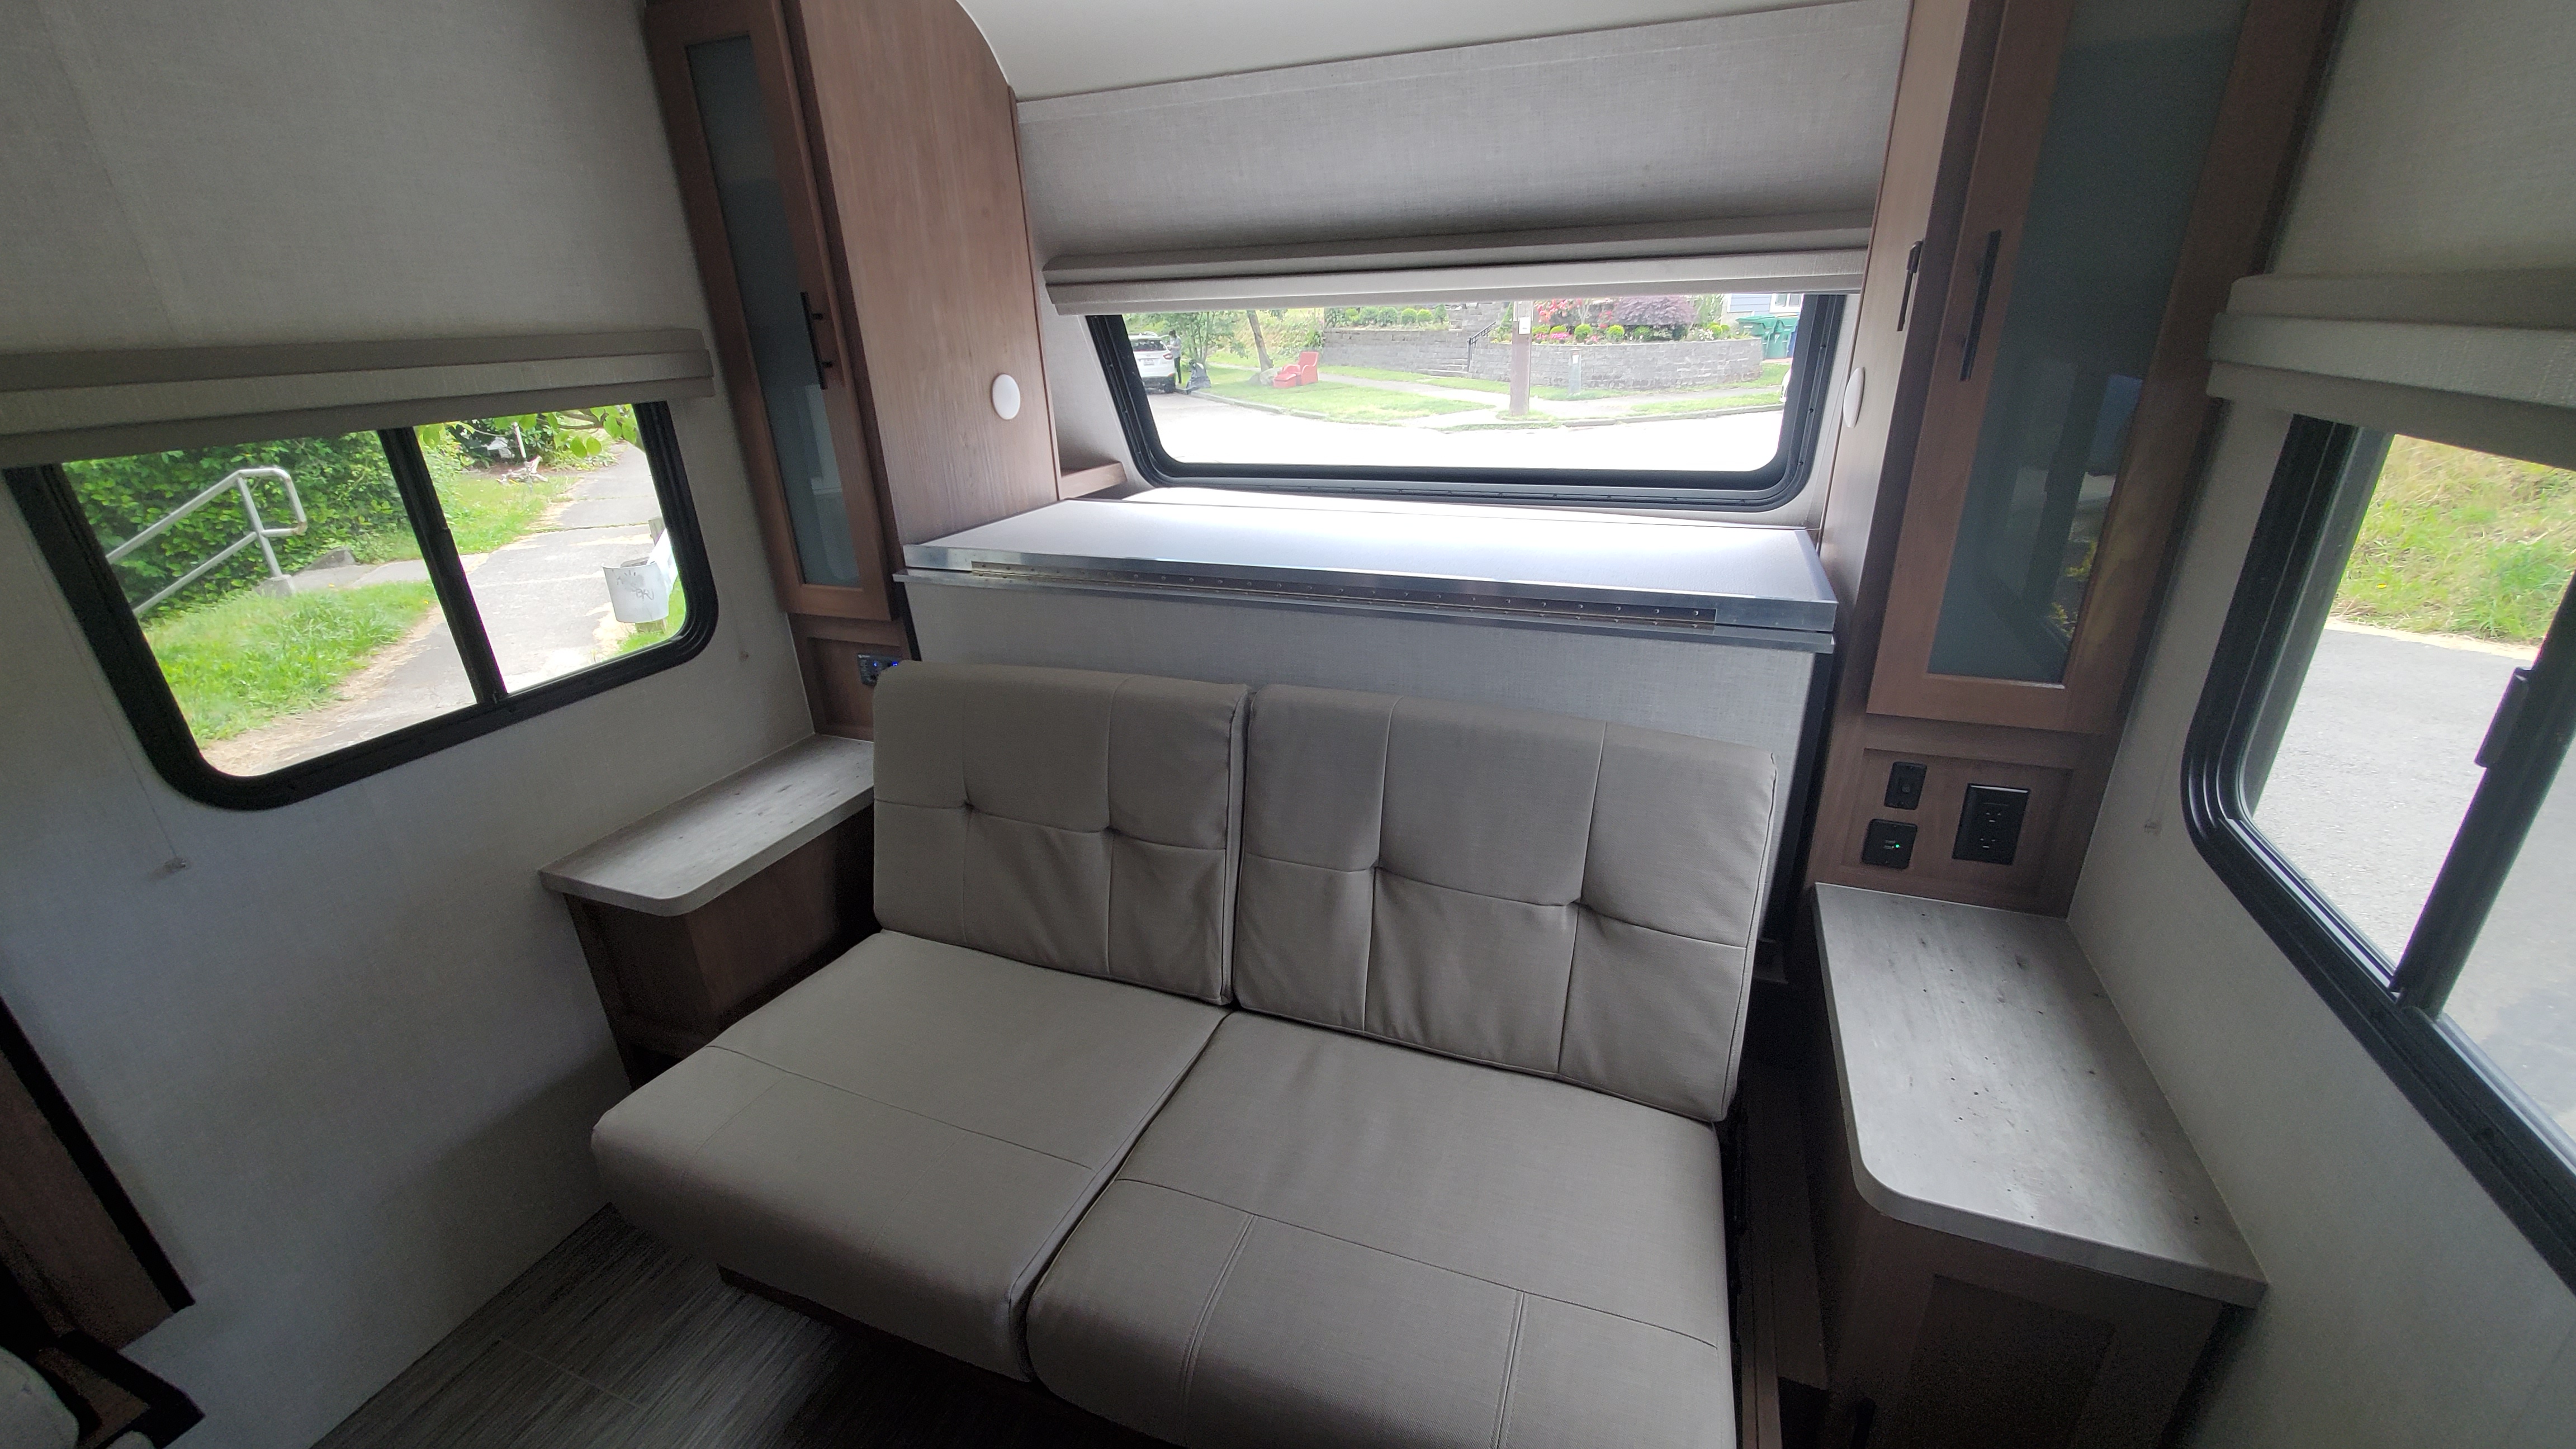
Full access to that window, and a table to boot (wouldn’t climb on it or anything but great for setting down drinks or books).
MAKING THE BED
The process to put the bed away is:
- Shove all pillows, comforters into the side holes out of the way.
- Flop the mattress over on top of itself. Smack it back against the wall.
- Flop the board half over. It’ll rest against the side of the mattress.
- Lift the board up to be on top of the mattress. Push it back as far as it’ll go.
- Insert the hasp latches and twist to lock. You may have to lift the board slightly to get to level and slip in the hasps.
With a tiny bit of practice it takes 15 seconds, maybe. And then enjoy your window!